
GOTODDY🐾
🐾GOTODDYField Guide Series
GoToddy Field Guide β€” Build Series No. 01

BUILD YOUR OWN BLUETOOTH SPEAKER

Under $15 in parts. No experience required. You'll wire it, build it, and own it. Then you'll understand why a JBL costs $80 and yours cost $12.
$12Parts Cost
3–4 HRSBuild Time
$35–60Sell Price
AGE 12+Skill Level
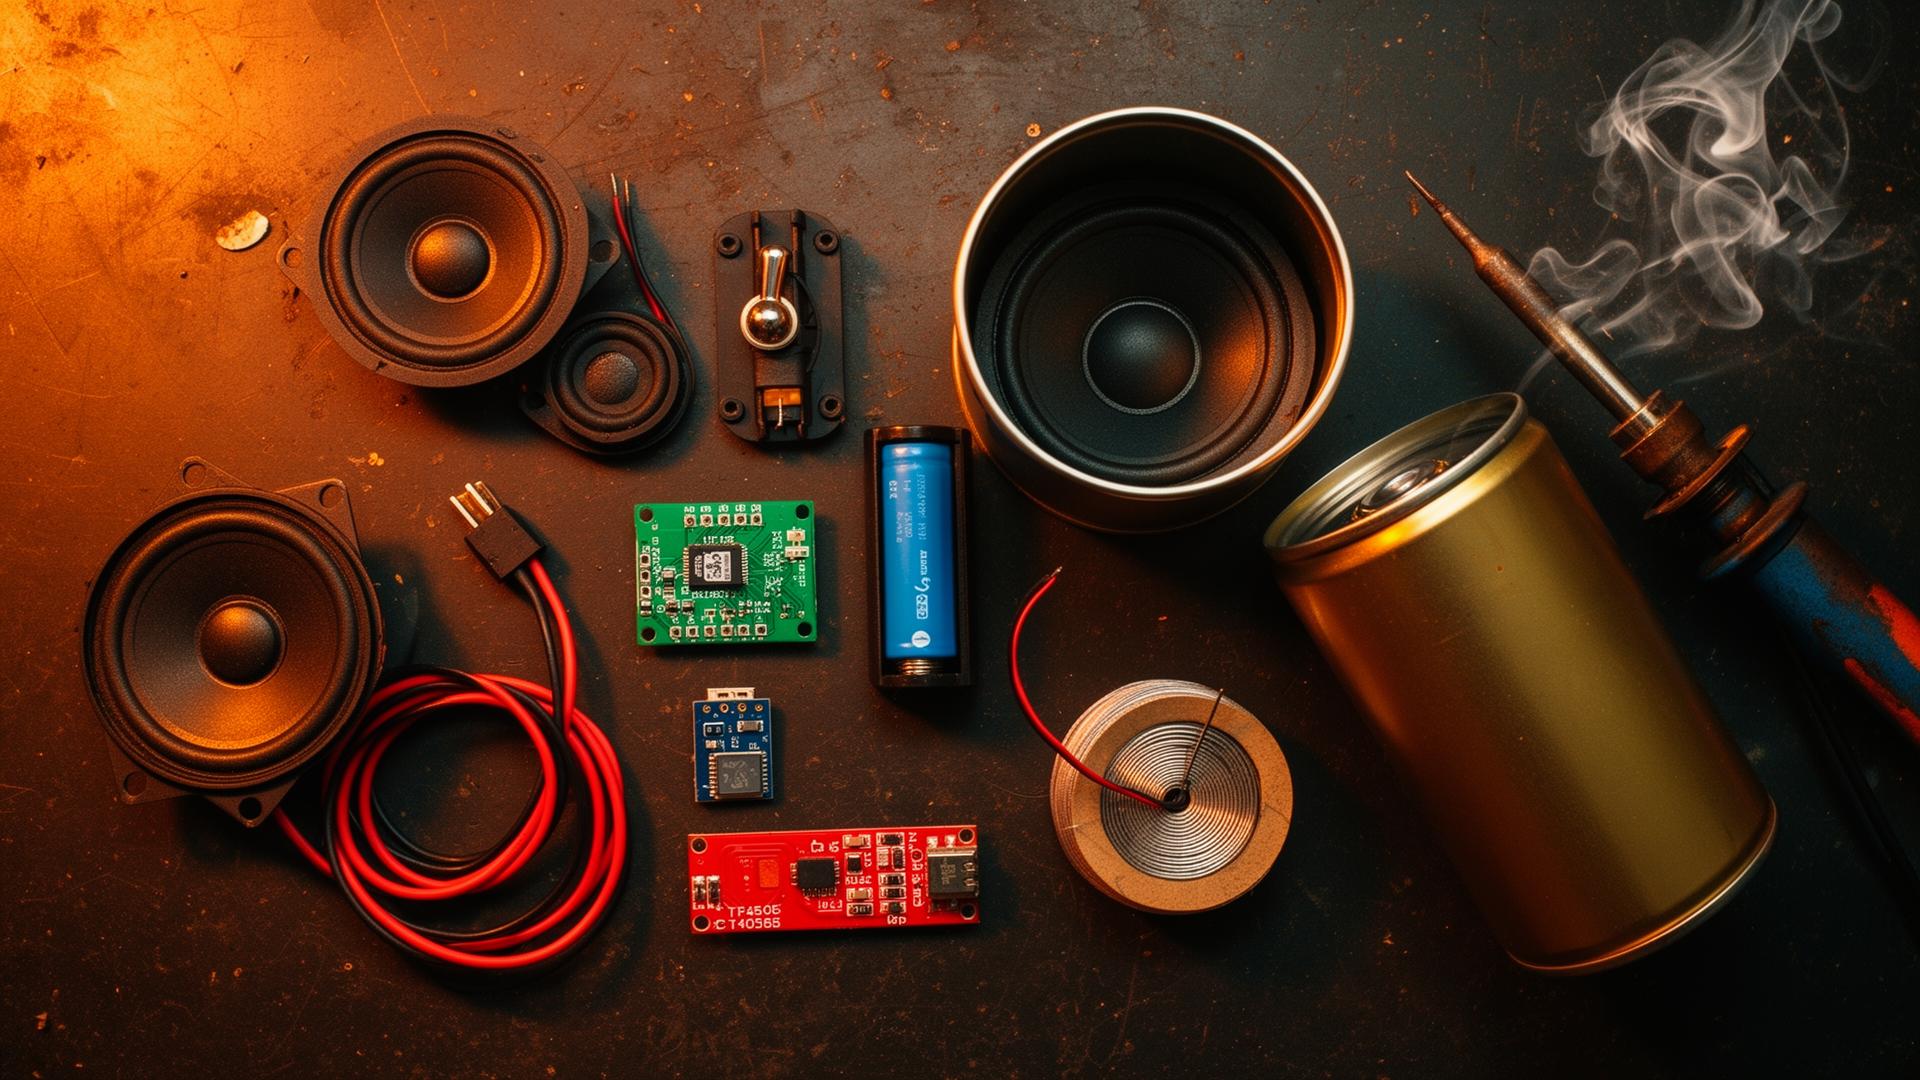
Flat-lay of a DIY Bluetooth speaker build kit on a workbench: drivers, amplifier board, Bluetooth module, TP4056 charger, 18650 battery, toggle switch, wire, soldering iron, and a coffee-can enclosure.
Everything you need. Spread out, ready to wire. About twelve bucks on the bench.
Before You Start

WHY BUILD INSTEAD OF BUY?

A $40 speaker from Amazon has about $6 in parts. The rest is brand, packaging, and the fact that nobody taught you to build one yourself. When you build it, you own the knowledge β€” not just the thing.

🐾 TODDY'S TAKE

This isn't a craft project. This is a business lesson disguised as a speaker. Every unit you build costs you $12. Every unit you sell earns you $35–60. That gap between cost and price? That's called margin. Learn it early.

What You Need

THE PARTS LIST

BLUETOOTH MODULE
JDY-62 or HM-10. Receives audio wirelessly.
~$3
AMPLIFIER BOARD
PAM8403, 3W/channel stereo. About the size of a quarter.
~$2
SPEAKER DRIVERS
Two 2–3 inch full-range, 4Ξ© 3W each. Must match amp output.
~$4
18650 BATTERY + HOLDER
One lithium cell, 3–5 hrs play. Panasonic or Samsung only.
~$4
TP4056 CHARGING BOARD
USB-C charging circuit. Protects from overcharge.
~$1
SWITCH + WIRE
Small toggle switch. 22 AWG wire, red and black.
~$1
🐾 TODDY'S TAKE

Don't cheap out on the battery. A knockoff 18650 cell is a fire risk. Spend the extra dollar and get a real one. The rest of the parts? Cheap is fine.

Pick Your Build

WHAT DO YOU BUILD IT IN?

EnclosureSoundCostDifficultySell Factor
Coffee / Food CanPunchy mids, resonant characterFreeEASYHigh β€” the story sells it
PVC PipeSolid cylindrical bass$2–4EASYMedium
Wood BoxBest acoustics, cleanest sound$5–15MEDIUMVery High
Vintage Tin or SuitcaseCharacter-heavy, unique$0–10MEDIUMVery High
Concrete ShellMinimal resonance, studio-clean$5ADVANCEDExtremely High
🐾 TODDY'S TAKE

Start with the coffee can. It's free, takes about 3 hours, and when someone asks what it's made of and you say "a Folgers can," they'll remember it. That's marketing you can't buy.

Enclosure Deep-Dive

THE PVC PIPE EDITION

If you go with PVC, you're not just picking a housing β€” a sealed cylinder creates back pressure that improves bass. Bigger pipe = more air = more bass. We shipped three sizes in the original Pup Audio guide. They all still work.

THE PUP
3" PVC Β· MONO
Single 3" driver, PAM8406 amp, 2Γ— 18650 in parallel for ~6 hours of play. About 8 inches long with end caps. Pocket-sized, loud enough for one room.
THE FORGE
4" PVC Β· STEREO
Dual drivers firing opposite ends, XY-P15W amp, ~8 hour battery. Real stereo separation. The sweet-spot build for most kids.
THE HOWLER
6" PVC Β· 30W
Dual 4" drivers, 30W amp, party-grade volume. Heavier, louder, more parts. Build the Pup first, then graduate to this.
PVC-SPECIFIC PARTS
  • 1Γ— PVC pipe, 6–10" length (3", 4", or 6" diameter β€” pick your build)
  • 2Γ— matching PVC end caps
  • 1Γ— PVC primer + cement kit (purple primer, clear cement)
  • PVC pipe cutter or hacksaw β€” both work, cutter is cleaner
🐾 TODDY'S TAKE

One end cap stays removable for service β€” friction-fit with foam tape, not cemented. The other end cap gets cemented. If you glue both caps shut and something fails, you're cutting your speaker open to fix it. Ask us how we know.

The Build

STEP BY STEP

This is the coffee can build. Same process for PVC. Adjust enclosure steps for other materials.

01
PREP YOUR CAN
Mark driver holes in the lid. Drill pilot holes, step-bit to size, deburr edges with sandpaper.
02
MOUNT THE DRIVERS
Press drivers into holes. Hot glue the edges from inside for an airtight seal. Cure 20 minutes.
03
WIRE THE AMPLIFIER
PAM8403 has L+/Lβˆ’/R+/Rβˆ’ pads. Solder speaker wires to matching outputs. Red to positive, black to negative.
04
CONNECT THE BLUETOOTH MODULE
BT module outputs L and R audio to PAM8403 input pins. Module needs 5V β€” tap from TP4056 output. Check your module's pinout before soldering.
05
WIRE THE BATTERY CIRCUIT
Chain: Battery β†’ TP4056 β†’ Switch β†’ PAM8403 power input. Switch breaks the positive wire so you can turn it off.
06
TEST BEFORE YOU CLOSE IT
Power on. Pair phone. Play audio. Check both channels. Check charging port. Fix problems now, not after it's sealed.
07
PACK AND SEAL
Line inside with foam. Mount switch and charging port through side holes. Secure electronics with hot glue or foam tape. Seal lid.
08
FINISH IT
Spray paint, vinyl wrap, custom label. A bare can is a prototype. A finished labeled speaker is a product.
Reference

WIRING DIAGRAM

POWER CHAIN
-----------
[18650 Battery] -> [TP4056] -> [Switch] -> [PAM8403]
                                          |
                                  (5V tap to BT module)

AUDIO CHAIN
-----------
[Phone (BT)] ~~~> [JDY-62 Module] --L/R--> [PAM8403]
                                                  |
                                       +----------+----------+
                                       |                     |
                                  [Speaker L]         [Speaker R]

// Red wire = positive, Black wire = negative.
// Switch breaks the positive line only.
Level Up

THREE VERSIONS TO BUILD

START HERE
VERSION 1 β€” THE CAN
  • Coffee can enclosure
  • PAM8403 amp
  • JDY-62 BT module
  • Two 2" drivers
  • Single 18650 cell
Time
~3 hrs
Sell
$35–45
LEVEL UP
VERSION 2 β€” THE BOX
  • Wood enclosure
  • XY-P15W amp
  • 3" drivers
  • Passive bass radiator
  • USB-C charging
Time
~6 hrs
Sell
$55–80
FLAGSHIP
VERSION 3 β€” THE SIGNATURE
  • Custom enclosure
  • NeoPixel LEDs
  • Built-in power bank
  • Custom branding
  • Retail packaging
Time
10+ hrs
Sell
$80–120
Make It a Business

THE NUMBERS DON'T LIE

$12
COST PER UNIT
Parts only. Your labor is extra.
$40
SELL PRICE
Honest price for the finished product.
$28
PROFIT PER UNIT
That's 70% gross margin. Better than most businesses adults run.
5Γ—
YOUR FIRST GOAL
Build 5. Sell 5. That's $140 profit and proof you can do this again.
🐾 TODDY'S TAKE

Where do you sell it? Start with people you know. Tell them you built it. Show them it works. Price it honestly. Don't underprice because you're nervous β€” that's the most common mistake. If it cost you $12 and 4 hours, it's worth $40. Own that.

When It Doesn't Work

TROUBLESHOOTING

?
NO SOUND AT ALL
Check switch, battery charge, BT pairing LED, then solder joints with multimeter.
?
ONE SPEAKER WORKS, ONE DOESN'T
Cold solder joint on dead channel. Reflow it. Check driver wire connection.
?
SOUND IS THIN OR WEAK
Out-of-phase speakers (swap + and βˆ’ on one driver) or enclosure not sealed (foam all gaps).
?
WON'T CHARGE
TP4056 LED: red = charging, green = full. No LED means check USB connection and B+/Bβˆ’ polarity.
Go Deeper

RESOURCES

🐾
Instructables β€” Battery Powered Boombox β†—
Step-by-step photo build of a portable BT speaker.
🐾
Circuit Digest β€” JDY-62 + PAM8403 Build β†—
Schematic-level walkthrough of the exact modules in this guide.
🐾
Instructables β€” Boombox From Scratch (44 steps) β†—
Deep build with custom enclosure and stronger amp.
🐾
YouTube β€” PVC Pipe Build β†—
Quick visual reference for the PVC enclosure version.
🐾
YouTube β€” Concrete Speaker β†—
Advanced enclosure technique β€” cast concrete shell.
🐾
Popular Mechanics β€” Any Object Into a Speaker β†—
Higher-level intro to the concept and creative enclosure ideas.
Variant Build

PRINGLES CAN VERSION

No PVC? No problem. Same circuit, different body. The Pringles-can build is faster, cheaper, and a perfect first build before you graduate to PVC.

OPEN THE PRINGLES CAN GUIDE β†’
Take The Next Step

READY TO TURN THIS INTO A REAL BUSINESS?

You've got the build. Now build the business around it. Pricing, costs, customers, a real plan β€” GoToddy walks you through it.

START YOUR BUSINESS PLAN 🐾
🐾
GoToddy Field Guide Series β€” Build No. 01: Bluetooth Speaker
More builds at gotoddy.ai